

| sitelink1 | https://phoenixnap.com/kb/how-to-flush-dns-cache |
|---|---|
| sitelink2 | |
| sitelink3 | |
| extra_vars6 |
Introduction
DNS cache can be corrupted for a number of different reasons, including network attacks or viruses. When that happens, IP address mapping becomes corrupted for certain popular websites.
For example, instead of going to www.facebook.com, your browser may redirect you to an IP address of a malicious website that an attacker inserted in your computer’s DNS records. Or, you may get a large number of 404 errors.
Clearing DNS cache deletes all saved DNS lookup information. Your computer then gets updated data from DNS servers next time it sends a lookup request. Learn how to flush DNS on in Windows, MacOS, & Linux below.
What is DNS Cache?
Linux, Windows, and macOS save name resolution information in the form of DNS cache. This speeds up project load times since the cache contains IP addresses for the queried domains. Instead of having to reroute to DNS servers, the system answers queries from the cache.
The DNS cache contains the following information:
- Resource data
- Record type
- Record name
- TTL (time to live)
- Class
- Resource data length
How to Flush DNS in Windows
Clearing DNS cache is an easy and quick process. The procedure is the same for almost all Windows systems. Foe the example below, we will be using Windows 10.
To flush DNS on your Windows machine:
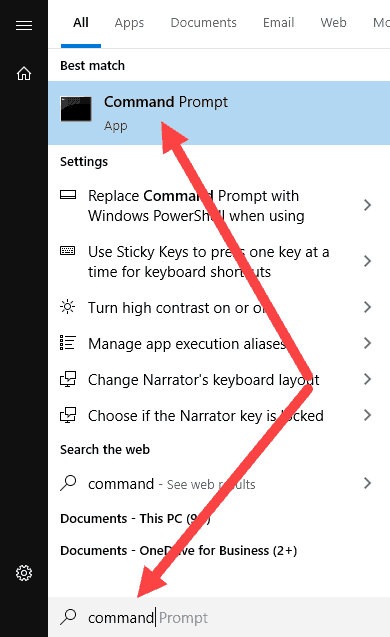
1. Load the Command Prompt as an administrator. Open the Start Menu and start typing command prompt until you see it in the results.
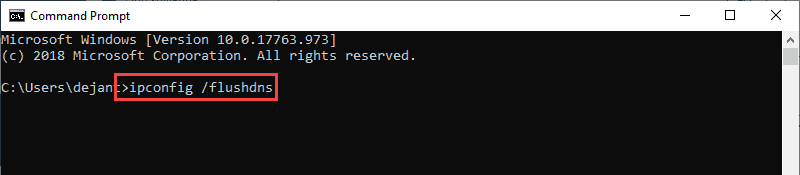
2. Type ipconfig /flushdns when the prompt loads and hit Enter on the keyboard.
3. The process should take only a few seconds. You should see the DNS Resolver Cache confirmation message when it’s done:
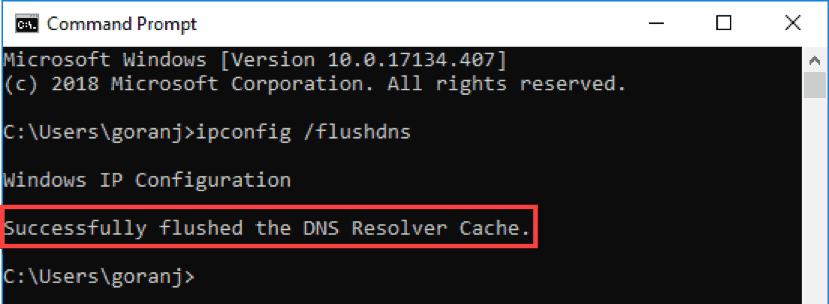
The DNS Cache database on your computer is now clear. You should get the correct and updated IP mapping from DNS servers next time your machine sends a DNS query.
How To Flush DNS Cache on Mac
There are a few different commands to use for flushing DNS cache on OS X and macOS depending on the version you are running.
As the procedure is the same on all versions, this article details how to clear DNS on macOS Mojave (10.14) and then list the commands for other versions in a table.
Flush DNS on macOS Mojave (version 10.14)

To clear DNS cache on macOS Mojave, use the Terminal application:
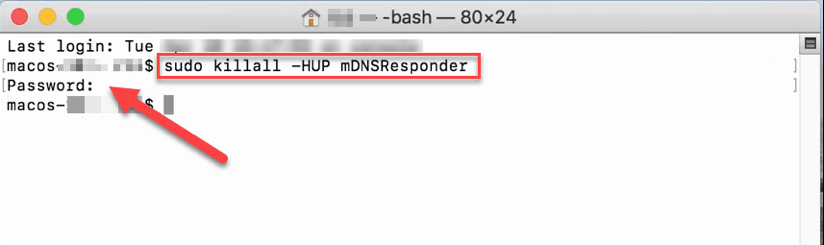
- Run terminal.app using your preferred method. You can launch the app from Applications -> Utilities or press Command + Space to launch Spotlight and search for Terminal.
- Type in
sudo killall -HUP mDNSResponderand hit Return on your keyboard. - Enter the administrator password for the account in question and hit Return.
There is no notification when the process finishes. However, you can append another command to change that.
Note: If you want to hear an audio notification after the DNS flush is complete, type say some text after the first command. For example:
sudo killall -HUP mDNSResponder; say dns cleared successfully
Flush DNS Commands on Older macOS and Mac OS X Versions
The table below lists the commands for clearing the DNS cache on most macOS and Mac OS X versions. You can copy and paste them directly from the table into your terminal.
| Mac OS X or macOS version | Terminal Command |
| Mojave (version 10.14) High Sierra (version 10.13) Sierra (version 10.12) Mountain Lion (version 10.8) Lion (version 10.7) |
sudo killall -HUP mDNSResponder |
| El Capitan (version 10.11) Mavericks (version 10.9) |
sudo dscacheutil -flushcache sudo killall -HUP mDNSResponder |
| Yosemite (version 10.10) | sudo discoveryutil mdnsflushcache sudo discoveryutil udnsflushcaches |
| Snow Leopard (version 10.6) Leopard (version 10.5) |
sudo dscacheutil -flushcache |
| Tiger (version 10.4) | lookupd -flushcache |
How to Flush DNS Cache in Linux
Linux distributions are a bit different from Windows and Mac machines. Each Linux distribution might use a different DNS service. Some distributions, like Ubuntu, don’t have a default DNS service at all.
It depends on which service you have on your distribution and whether it is enabled by default. Some of them are NCSD (Name Service Caching Daemon), dnsmasq, and BIND (Berkely Internet Name Domain).
For every distribution, you need to launch a terminal window. Press Ctrl+Alt+T on your keyboard and use the corresponding command to clear the DNS cache for the service your Linux system is running.
Flush Local NCSD DNS Cache
Use this command to clear NCSD DNS cache on your Linux machine:
sudo /etc/init.d/nscd restart
Enter your password if necessary. The process stops and then starts the NCSD service within seconds.
Flush Local dnsmasq DNS Cache
Use this command to clear the dnsmasq DNS cache on your Linux machine:
sudo /etc/init.d/dnsmasq restart
Enter your password again, if the terminal asks you to. You will see the response when the service stops and starts again.
Flush Local BIND DNS Cache
If you use BIND for DNS service, there are a few commands you can use to flush its DNS cache. You may need to enter your password to finish the process.
sudo /etc/init.d/named restart
sudo rndc restart
sudo rndc exec
Note: BIND also allows you to target specific domains when performing a DNS flush. Just append flushname and the domain name to the sudo rndc command. For example:
sudo rndc flushname phoenixnap.com
Conclusion
You have now learned how to clear or flush DNS cache on Windows, Linux and macOS systems.
The Internet we use today would not be the same without the immense work that Domain Name Systems do. We, as users, may not be aware of how many processes occur before we see a webpage or receive an email, and that’s why it’s important to flush DNS.